Guía profesional: Cómo montar una torre de andamio de aluminio de forma segura y eficiente.
Mar 26, 2026
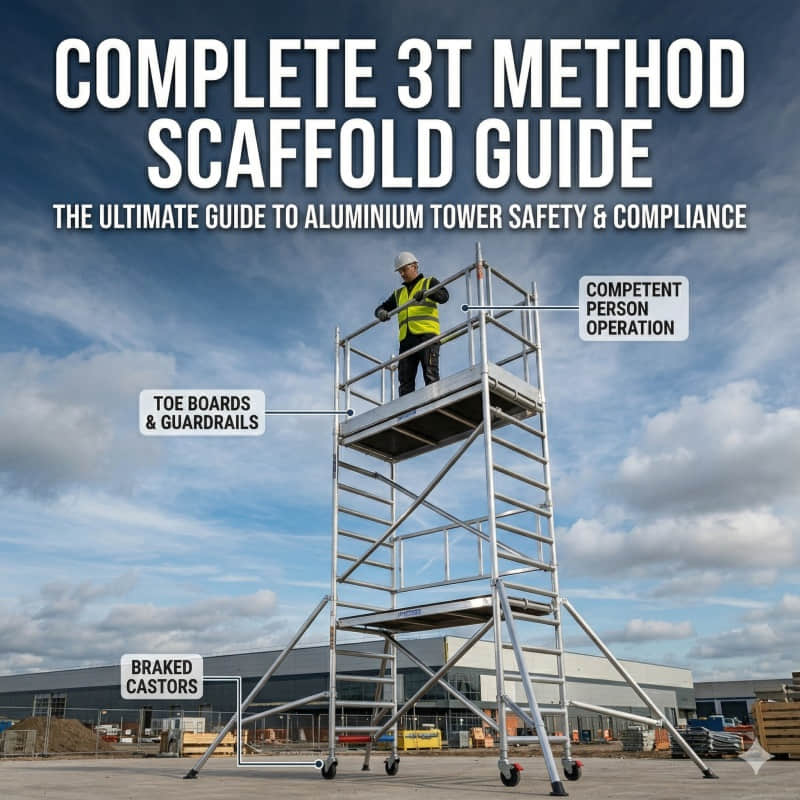
En los sectores modernos de la construcción, la ingeniería y el mantenimiento, el trabajo en altura sigue siendo la principal causa de muertes y lesiones graves en el lugar de trabajo. Torre de andamios de aluminioSe ha consolidado como una solución de primera categoría para estos desafíos, ofreciendo una combinación única de alta relación resistencia-peso, despliegue rápido y resistencia a la corrosión.Sin embargo, la comodidad de las torres de acceso móviles suele generar complacencia. Una torre no es simplemente una escalera con una plataforma; es una estructura de ingeniería de precisión que se basa en la lógica de las celosías y en componentes interconectados. Un desconocimiento de la física de una torre, como su centro de gravedad o su resistencia a la carga del viento, puede provocar fallos estructurales catastróficos. 1. Premontaje: Evaluación de riesgos y cumplimiento normativo Antes de que cualquier equipo salga del almacén, debe llevarse a cabo una rigurosa fase de premontaje. En entornos profesionales, esto implica mucho más que una simple mirada al suelo. Comprensión de las normas EN 1004La mayoría de las torres de aluminio de alta calidad están diseñadas para cumplir con la norma EN 1004. Esta norma especifica los materiales, las dimensiones y las cargas que la torre puede soportar de forma segura. Como profesional, debe verificar que su torre tenga la clasificación de carga específica requerida para su tarea. Generalmente, se requiere una clasificación de Clase 3 para trabajos de construcción en general, que soporta una carga distribuida de 2,0 kN/m². Estudio del emplazamiento y evaluación de riesgos (RAMS)Se debe realizar una evaluación de riesgos y una declaración de métodos formales (RAMS). Las consideraciones clave incluyen:Capacidad portante del terreno: ¿La superficie puede soportar todo el peso de la torre, los empleados y sus herramientas? Se necesitan bases (generalmente de madera) en superficies de asfalto, suelos blandos o losas suspendidas debido a la posibilidad de falla por carga puntual.Factores ambientales: Compruebe si hay edificios que creen un corredor de viento fuerte, llamado EFECTO Venturi (el aumento del viento provocado por los edificios que crean un corredor), lo que genera fuertes vientos en la torre. Riesgos de proximidad: Localizar los cables aéreos, los equipos móviles como carretillas elevadoras y grúas, el tráfico peatonal y la necesidad de instalar vallas o barreras físicas. Inspección de componentesCada componente debe verificarse según las especificaciones del fabricante. Utilizar componentes de diferentes marcas de forma indiscriminada constituye una grave infracción de seguridad que puede provocar un colapso estructural.Rizos: Verifique que los neumáticos no tengan zonas planas y que tanto la rueda como el pivote estén bloqueados por el mecanismo de freno.Patas ajustables: Confirme que las roscas de las patas ajustables estén libres de lodo de hormigón, arena y residuos para garantizar una nivelación correcta de la unidad.Ganchos de sujeción: Los resortes internos deben ofrecer resistencia, y el "gatillo" debe fijarse firmemente al armazón sin necesidad de aplicar ninguna fuerza manualmente. 2. El proceso de erección en 7 pasos: un análisis técnico Seguir una secuencia estandarizada reduce el margen de error humano. Utilizamos el método 3T, que es el estándar de referencia para la protección colectiva contra caídas en la Unión Europea y el Reino Unido. Paso 1: Despejar la zona y establecer la zona segura.Despeje un perímetro de al menos 2 metros alrededor del área de trabajo prevista. Coloque todos los componentes de forma sistemática: marcos, soportes, plataformas y estabilizadores. Esto evita tener que buscar piezas en altura, lo cual es una de las principales causas de sobreestiramiento, factor clave en las caídas desde altura. Paso 2: Conecte las patas ajustables y las ruedas.Comience con dos marcos base (generalmente marcos de escalera). Inserte las patas ajustables y las unidades de ruedas.Detalle técnico:Estas piezas deberían encajar sin forzar los marcos. Si no entran con facilidad, es probable que el marco se haya deformado debido a algún daño previo.Acción crítica:Accione inmediatamente los frenos de las ruedas. Una torre debe construirse "desde una base bloqueada". Paso 3: Colocar los soportes horizontalesUne los dos marcos usando dos soportes horizontales.Posicionamiento:Fije los puntos de anclaje a los tubos verticales en la parte superior. Lo ideal es colocarlos justo encima del primer o segundo peldaño para crear una base rígida.Integridad geométrica:Debemos comprobar que las diagonales tengan la misma longitud. Si no la tienen, la base no será cuadrada y nuestra torre comenzará a inclinarse. Esta inclinación aumentará con el tiempo y afectará la ubicación del centro de gravedad del peso. Paso 4: Nivelar la base de la torreUtilice un nivel de burbuja profesional tanto en los marcos como en los tirantes horizontales.Ajuste:El operador debe ahora compensar las irregularidades del terreno ajustando los collares de las patas del tractor. Está prohibido apoyar una pata con ladrillos sueltos, trozos de madera o piedras.Margen de seguridad:Mantenga la rosca de ajuste en una posición baja para lograr el mayor margen de seguridad posible, debido a la máxima superposición entre la pata y el armazón. Paso 5: Conecte la plataforma inicialInstale una plataforma con trampilla en el nivel más bajo recomendado.La entrada 3T:La trampilla debe colocarse de manera que la escalera interior proporcione un acceso fácil y sin obstáculos.Bloqueos de viento:Asegúrese de que los ganchos estén bien sujetos a los peldaños y que los clips de bloqueo contra el viento estén activados. Esto evita que la plataforma se levante, lo que podría provocar que el viento o el movimiento de personas la desplacen accidentalmente de su base. Paso 6: Aumentar la altura de la torre (Técnica 3T)A medida que se añaden los fotogramas subsiguientes (normalmente secciones de 2 metros), el método 3T dicta una posición específica al sentarse:Acceda a la plataforma a través de la trampilla.La posición sentada:Mientras estás sentado en la trampilla con los pies sobre los peldaños de la escalera de abajo, tu cuerpo está protegido por los marcos.Instalar barandillas de seguridad:Encaje los soportes horizontales en su lugar para crear una barandilla a aproximadamente 0,5 m (barandilla intermedia) y 1,1 m (barandilla superior) por encima de la plataforma.Altura final:Solo cuando las barandillas estén bien sujetas por todos los lados, podrá pararse completamente sobre la plataforma para añadir el siguiente conjunto de marcos. Paso 7: Barandillas, rodapiés y estabilizadores finalesA la altura final de funcionamiento, la torre debe estar completamente cerrada.Tableros de protección para los pies:Instale estos dispositivos alrededor de la plataforma de trabajo. En entornos urbanos, este es un requisito legal fundamental para prevenir riesgos de caída de objetos para los peatones.Estabilizadores (apoyos laterales):Deben colocarse en cuanto la altura alcance la proporción especificada por el fabricante. Asegúrese de que las patas estabilizadoras estén firmemente apoyadas en el suelo y de que las abrazaderas estén bien apretadas para evitar que giren. 3. Índices de estabilidad y gestión de la carga de viento Comprender la física de una torre móvil es lo que distingue a un profesional de un aficionado. Las torres de aluminio son ligeras por diseño, lo que las hace vulnerables a la fuerza del viento. Relación altura-baseEl "Índice de Estabilidad" es la altura de la torre dividida por la dimensión mínima de su base.Uso interno: Normalmente, una relación de 3,5:1 es aceptable si no hay cargas laterales.Uso externo: Debido a las cargas de viento, esta relación se reduce a 3:1. Si su torre tiene 2 m de ancho y 1 m de profundidad, su "dimensión de base" para el cálculo es de 1 m, lo que significa que su límite de altura es significativamente menor que el de una torre de base cuadrada. Límites de velocidad y fuerza del vientoCon vientos superiores a 27 km/h (17 mph), se debe detener todo trabajo en la torre. A velocidades mayores, la torre debe desmontarse o sujetarse firmemente a una estructura permanente mediante anclajes especiales. Nunca coloque redes de protección ni pancartas grandes en una torre móvil; estas crean un efecto de vela que puede generar la fuerza suficiente para volcar incluso una torre completamente estabilizada con ráfagas moderadas. 4. Cómo desmantelar una torre de forma segura El desmontaje no es simplemente "montar a la inversa"; requiere un cuidado específico para garantizar que ningún componente se caiga o se dañe.Despeje la plataforma: Asegúrese de que no queden herramientas, escombros ni rodapiés en el nivel superior.El descenso 3T: Acceda a la plataforma superior mediante la escalera interior. Abra la trampilla y siéntese dentro.Retire las barandillas: Desde la posición sentada, desenganche los soportes de la barandilla. Deje siempre los soportes inferiores en su lugar hasta que haya descendido al siguiente nivel.Manipulación de componentes: Pase los componentes a un compañero o utilice un cable de elevación fiable y un sistema de poleas ligero. Nunca arroje los componentes al suelo. El impacto contra el hormigón provoca microfisuras en el aluminio, invisibles a simple vista, que pueden causar fallos catastróficos durante el siguiente uso. 5. Mantenimiento y almacenamiento: Protegiendo sus activos Para las empresas de alquiler de equipos y los grandes contratistas, la vida útil de la torre depende de un mantenimiento profesional.Limpieza: Elimine inmediatamente cualquier salpicadura de yeso, cemento o pintura. Estos materiales pueden ocultar grietas estructurales o impedir que los soportes se fijen correctamente.Lubricación: Aplique un lubricante de silicona en aerosol seco en los ganchos del gatillo. Evite los aceites o grasas pesadas, ya que atraen la suciedad y el polvo, lo que puede desgastar los mecanismos de bloqueo.Almacenamiento: Guarde los marcos en posición vertical en estanterías específicas para evitar que se doblen. Asegúrese de protegerlos de productos químicos corrosivos, en particular de los ácidos utilizados para la limpieza de ladrillos o de los disolventes industriales. 6. Errores comunes que debes evitar (La lista de "Nunca") NuncaUtilice una torre como soporte para una escalera u otro andamio.NuncaMover una torre cuando haya personas o materiales sobre ella.NuncaSube por el exterior de la torre.Nuncautilizar una torre a la que le falte su "Scafftag" o registro de inspección.NuncaNo se incline sobre las barandillas para realizar el trabajo; en su lugar, mueva la torre.NuncaSúbete a las barandillas para ganar altura. Conclusión Dominar el montaje de una torre de andamios de aluminio es una competencia fundamental para cualquier empresa moderna de construcción o ingeniería. Al adherirse a las normas Proceso de 7 pasosy el Método 3TNo solo estás siguiendo las reglas, sino que también estás protegiendo vidas, reduciendo el riesgo del proyecto y aumentando la eficiencia del equipo.En un sector donde la reputación se basa en la seguridad y la fiabilidad, utilizar equipos de alta calidad que cumplan con la norma EN 1004 es el primer paso. El segundo es garantizar que su equipo esté capacitado, sea competente y diligente en sus prácticas de montaje. Un lugar de trabajo seguro es un lugar de trabajo productivo, y una torre bien montada es la piedra angular de esa seguridad. Preguntas frecuentes ¿Necesito una licencia para montar una torre de andamios de aluminio?En muchas jurisdicciones (como el Reino Unido bajo las regulaciones PASMA o los EE. UU. bajo OSHA), no se necesita una "licencia" como una licencia de conducir, pero sí se necesita una debe ser una "persona competente". Esto implica contar con la formación, los conocimientos y la experiencia necesarios para ensamblar, usar y desmontar la torre de forma segura. En los sitios profesionales, generalmente se requiere un certificado de formación reconocido. ¿Puedo usar una torre de aluminio en un terreno inclinado?Sí, pero solo si la torre está equipada con patas ajustablesDebes usar estas patas para nivelar la torre a la perfección con un nivel de burbuja. Nunca uses ladrillos, bloques de madera ni materiales sueltos para reforzar una pata en una pendiente, ya que pueden ceder bajo carga y provocar que la torre se vuelque.


 en
en fr
fr es
es